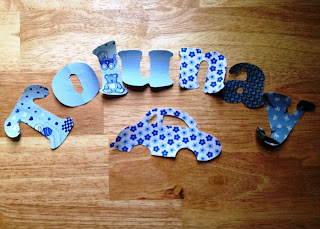
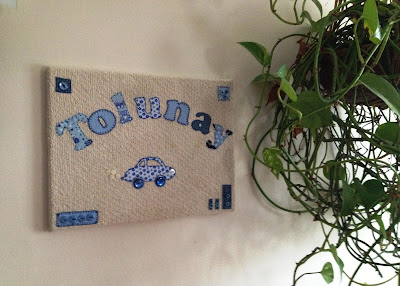
I have seen many new baby presents on Pinterest and I immediately was drawn to doing something with his name - after all I don't think there are many ready-to-buy "Tolunay" gifts. I am not a trained seamstress but really wanted to give appliqué a go... So I have sort of cheated and made a bit of wall art for his room instead of a quilt (which I would love to learn to do one day).
I typed out Tolunay into Word, selected Cooper Black and increased the font to 180. There are obviously lots of different ways to do this but as each letter would be cut out separately, this was the easiest. Whatever font and size you use, it needs to be big enough to be a decent template for each letter.
I had previously bought some mixed pre-cut 3 inch squares of fabric from e-bay for next to nothing (£1.99 for 50) and picked the blue ones. (I know its a bit cliché but I wasn't sure about their colour scheme etc. so went for what I thought was the safest).
I realised my canvas was going to be a bit blank and boring so thought I would try to draw a car. I did this with hilarious results! Hopefully babies aren't as critical as Dunc was...!
I ironed each square to one side of some fusible web (my first time with this and why didn't I know about it before?!!!) and then using the letters as templates, cut each one out. I also decided to use some of the scraps from the letters as blocks for the corners.
The backing fabric was from a remnant bin at Dunelm Mill. It cost around £2 for a couple of metres and I think its meant to be for curtains or upholstery... After removing the paper backing from the letters and other pieces, I ironed them into place. Hopefully this meant that my stitching could be less than perfect!
I decided to go with a variety of stitches. One day I will get a grown up sewing machine and learn how to do this by machine. My little one was not up to the job, but luckily I quite enjoy hand stitching! I also spent well over half an hour picking buttons. I have inherited a huge stash and doing this has made me realise that I need to sort them out by colour... Mally could help me!
Finally I stretched it out over a ready-to-use canvas and stapled it down. I could have made a frame myself but... well actually no, I couldn't!!! I had bought a bulk of these on sale so happy to use one for this project!
And here it is hung up on the wall - of my mum's house (as I haven't sent it on yet but wanted to share!!)


This is very cute! You did a wonderful job on it!
ReplyDeleteThanks Lisa! xx
DeleteBeautifully made. Your stitching and choice of fabrics is lovely.
ReplyDeleteThanks Naida! I'm still new to sewing so that is a lovely compliment xx
DeleteVery cute, and congratulations - I nominated you for a Liebster Award! If you would like more information here is the link:
ReplyDeletehttp://www.makesomethingdaily.com/2013/04/liebster-award.html
Thanks Meghan! xx
DeleteWhat an awesome idea and you did a fabulous job!
ReplyDeleteThanks Liana! xx
DeleteThis is gorgeous. Well done. visiting from sew darn crafty
ReplyDeleteThank you so much! xx
DeleteBeautiful! Love the colors and textures.
ReplyDeleteI'm visiting you today from Wow Me Wednesday. I hope you get a chance to stop by my blog and leave a comment, too!
~ Megin of VMG206
Burlap Ruffle Wreath
Thanks Megin, I definitely will have a look! xxx
DeleteVery pretty. I especially like your choice of fabrics. Visiting from Sugar Bee.
ReplyDelete-Aimee
http://thecrazycraftlady.com
Thanks Aimee, ebay scraps! Not bad hey?! xx
Delete