


Float (window) glass is quite unpredictable to fire but very much worth the results. Many materials can be placed between the glass sheets before firing and these include pieces of metal, metal oxides, shards or powdered coloured glass, and organic forms such as leaves and twigs. When fusing temperatures are reached, some of the ‘inclusions' undergo a chemical reaction which causes changes in colour/appearance. These changes are a bit unpredictable and sometimes dramatic so the whole process is a sort of alchemy - you are literally ‘drawing and painting' using these materials and are able to create your own work of art. One example of such a change is the firing of silver leaf which can leave a beautiful yellow stain after being fused.

We started with a test piece of 3 x 3 inches which were fired in the kiln immediately so that we were able to see the finished results in the afternoon! We used a variety of metal leaves, foil, wire and included bits from home...


Our next experiments were to incorporate the coloured frit (granules of coloured glass) to create more depth, interesting patterns and to see how they might interact with the metals. We again worked on the 3 X 3 inch tiles, this time with an expectation to cut them ourselves. Luckily all of us on the course had done stained glass to varying degrees so this bit was done quickly - allowing more time for "playing"!!


After a lovely lunch break in Sue's back garden (with a beautiful view!) we spent the afternoon creating our own pieces. We were free to chose our own sizes of pieces (within reason and kiln size) and create anything we wanted:

Sian
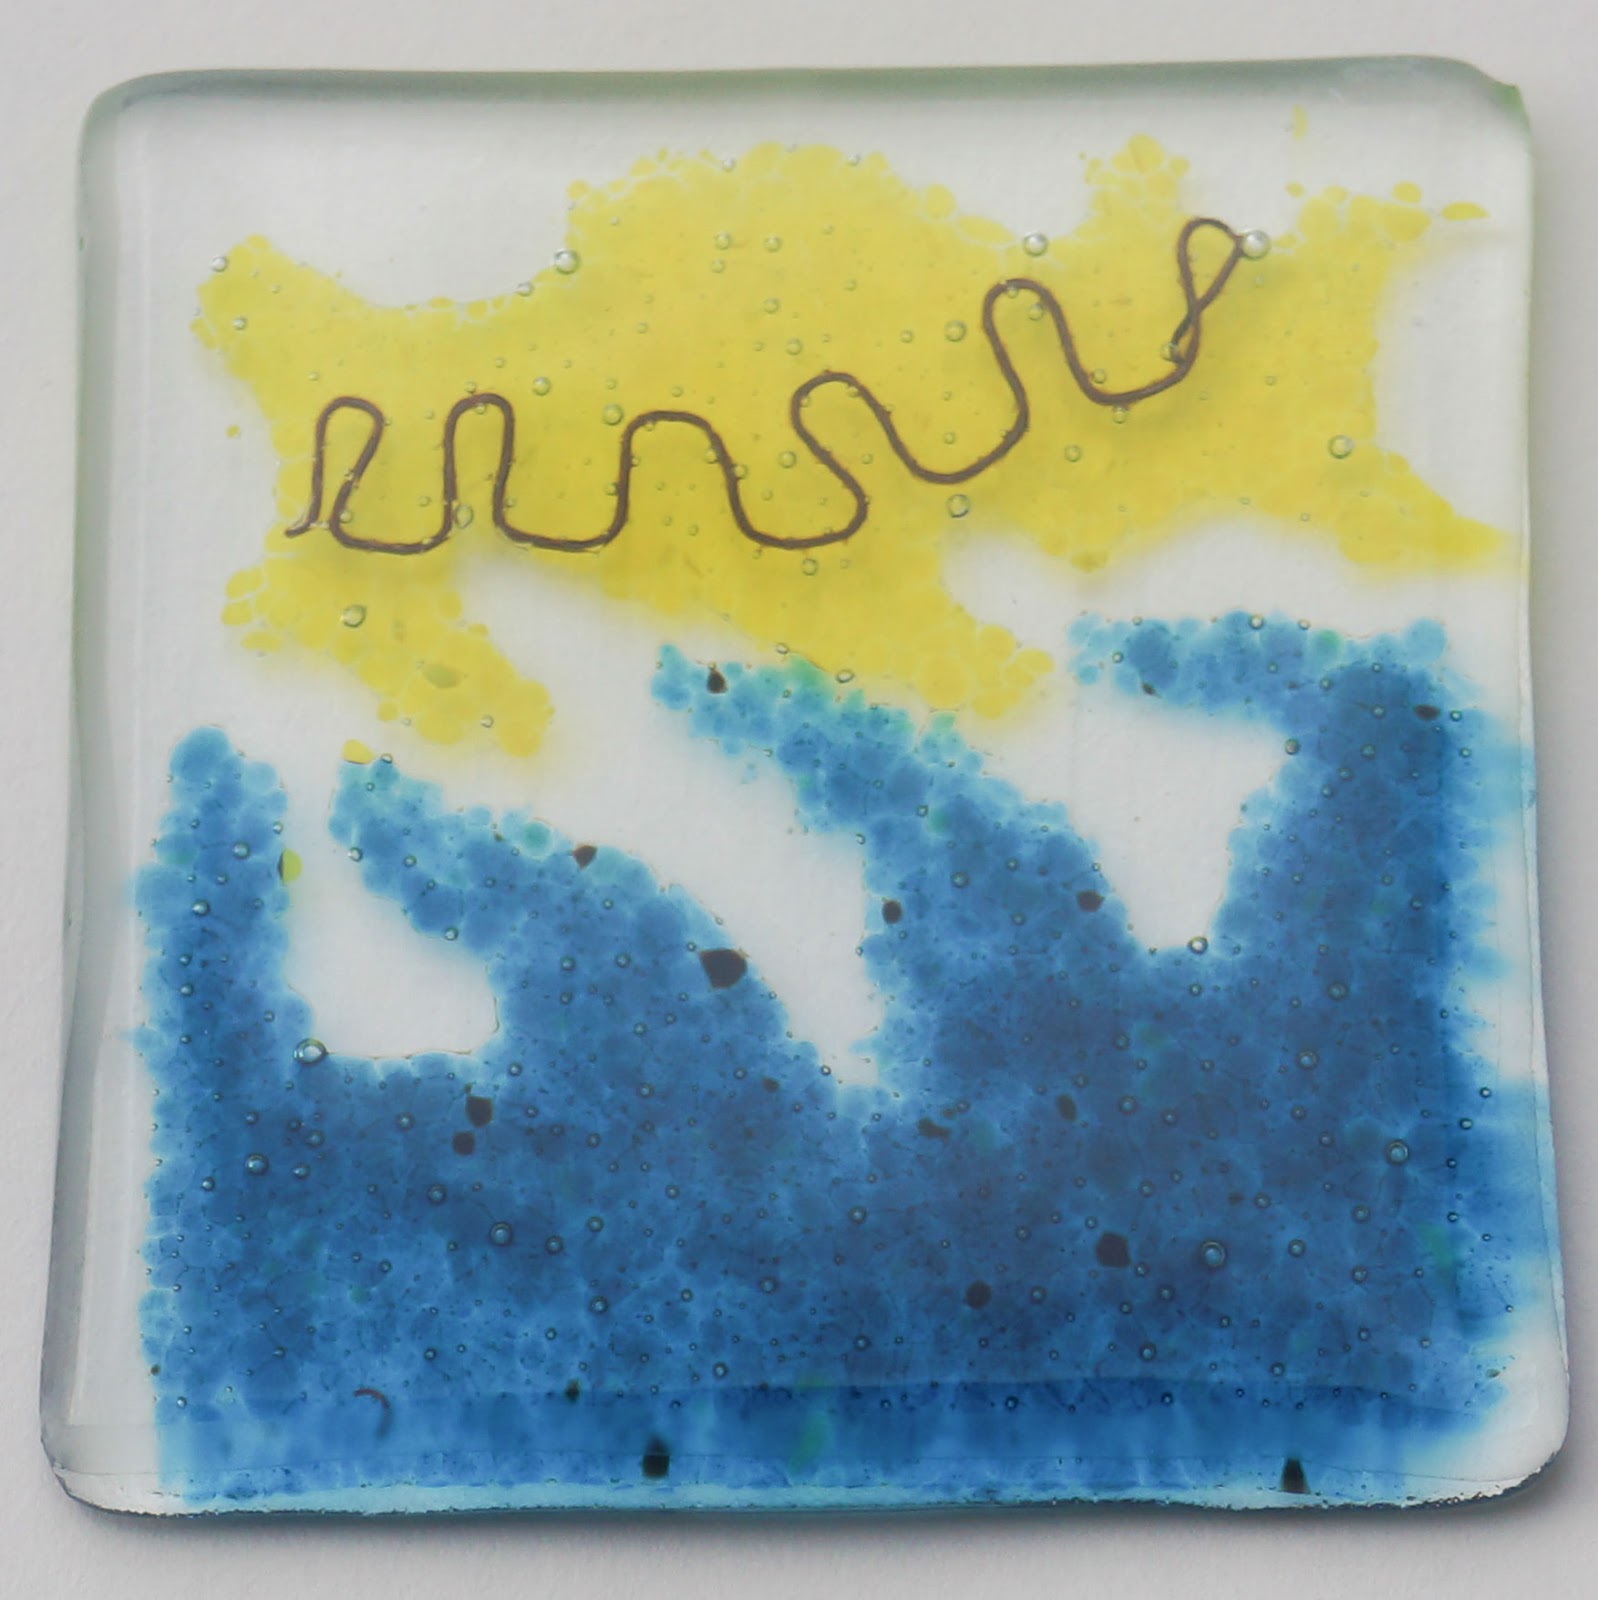
I really liked the way the paperclip and ring pull looked on my first pieces, so decided to use them again in one of my bigger pieces. The general theme of the first was water and sunshine (in a slightly abstract way!). To create this I used copper foil with holes punched out, some glass shards and powder along with some other random pieces (chain and ring pull) that I had brought along.


For my second piece, I went with a nature/leaf theme. This was using a mixture of wire, copper leaf and foil as well as green glass granules and shards. I also added some ivy and conifer pieces which left a really interesting 'ghost effect'.


Simi
My first piece was inspired by the samples of the coloured frit that we had been shown - they look like they could be microscope slides (I think we have mentioned a thousand times before that we are a bit very geeky!). I decided to go with a cellular kind of image and played around with wire including some fibrous brillo pad, and topped it off with red frit to represent... well... blood... Not strictly accurate but lots of artistic license used!!!


For my second piece, I didn't really know what I was doing but wanted to use a broken chain necklace I had brought with me. As I started looping it around it seemed to look like city blocks and I decided to go for an abstract cityscape. Working off of my test piece form the morning, I knew the copper leaf would make a good base for a cloudy sky and then I used aluminium pieces (including the paperclips) to create an industrial type look...


We had a fantastic day and it was great to learn a new technique as well as having the opportunity to create our own pieces. It was a strange feeling creating something with the uncertainty of what they would turn out like, but that was definitely part of the fun!
You can take a look at the other fab pieces created by everyone on the course at Glass Jewels' blog here

It looks like you've had an interesting time, I love the leafy one the best I think.
ReplyDeleteThank you! We had a really great time and it was so interesting learning this new technique x
DeleteOh, my goodness. One of my dreams is to do something crafty with glass like this. You've inspired me to check out courses in my area. Thanks :)
ReplyDeleteThanks Allison! Hope you find a course in your area.... we'd definitely recommend trying it out :) x
Deletewhat an interesting and original idea! thanks for sharing!
ReplyDeleteYou're welcome Liz! x
Delete